

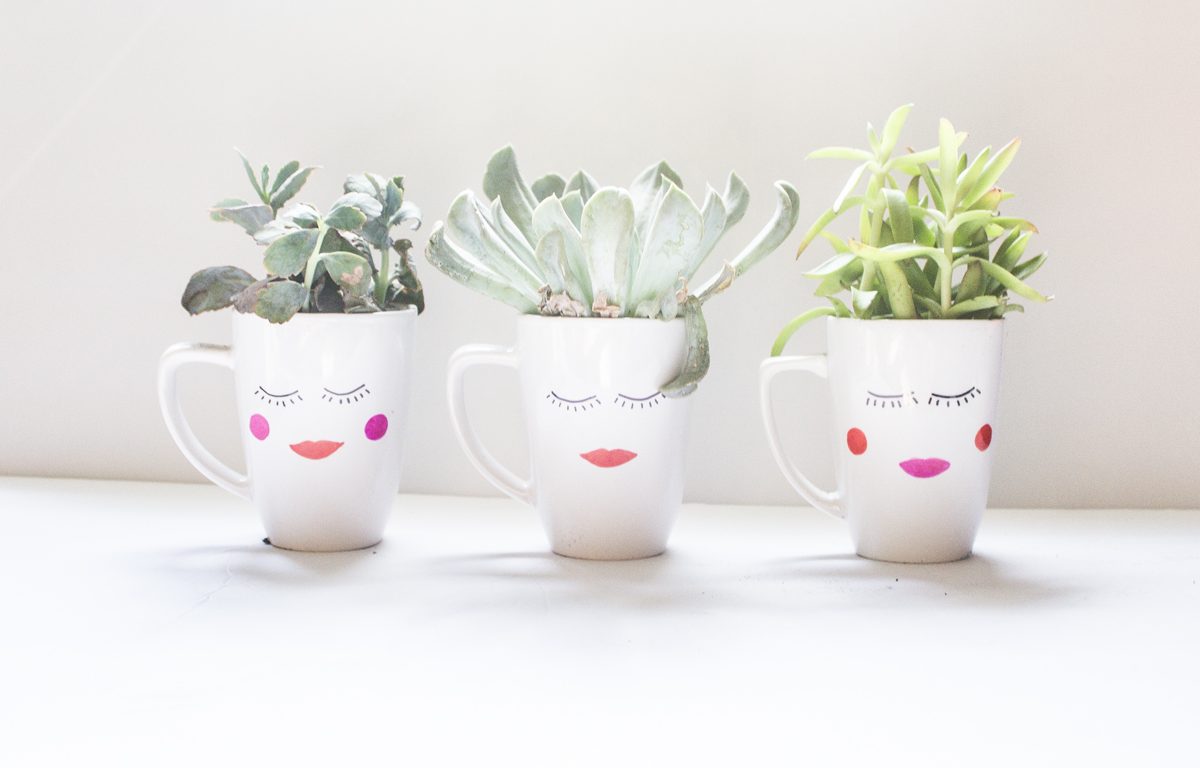
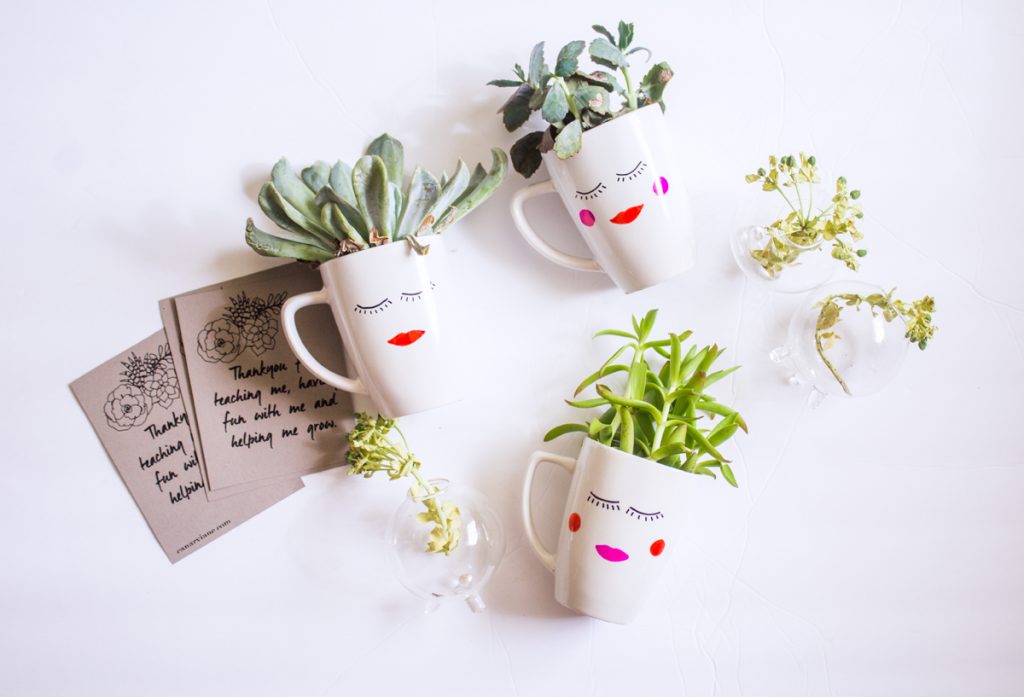
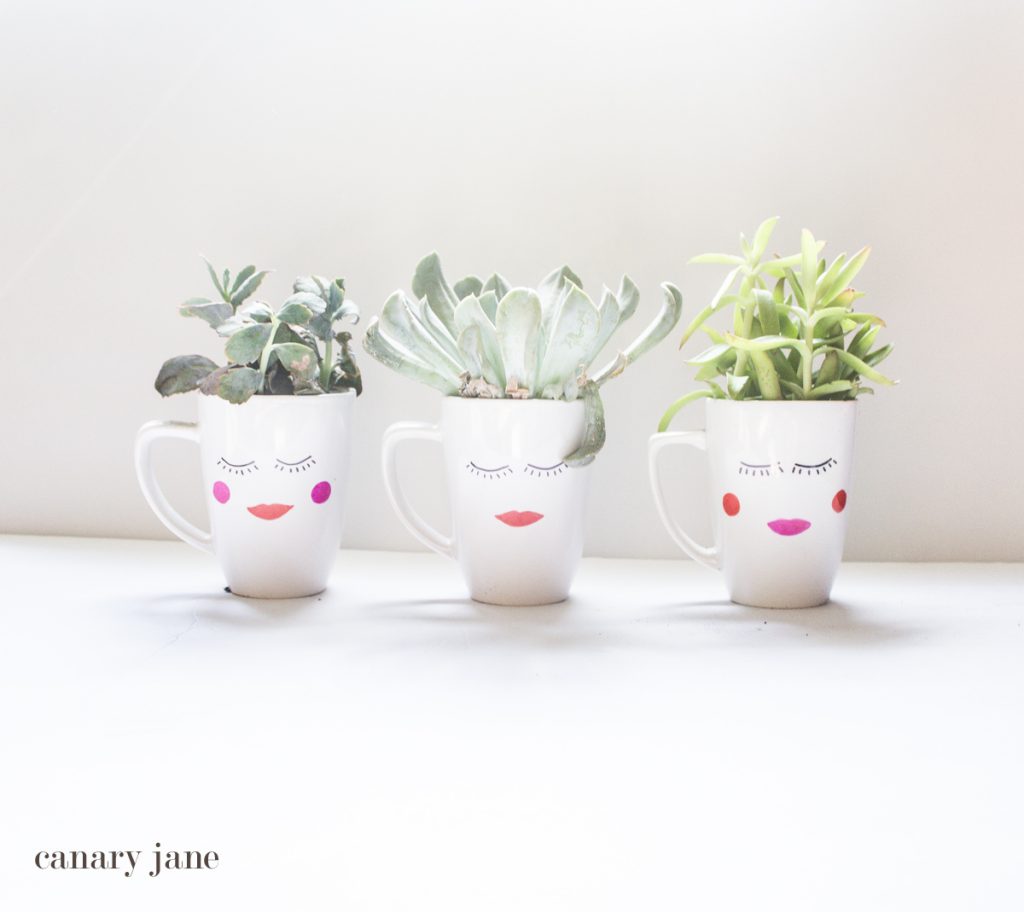
I’ve seen these Face Vase planters all over the place and I’ve always thought they were super fun with the simple face and plant as hair. So I decided instead of dropping $10+ a vase I could make my own. I used these as teacher appreciation gifts but you could use them for mothers day, grandmas birthday, or just a day you celebrate a female, holla! So since I used them as a gift, I designed a cute floral card to go with it. So read through my super simple tutorial on how to make a Face Vase for a $1!
Face Vase DIY

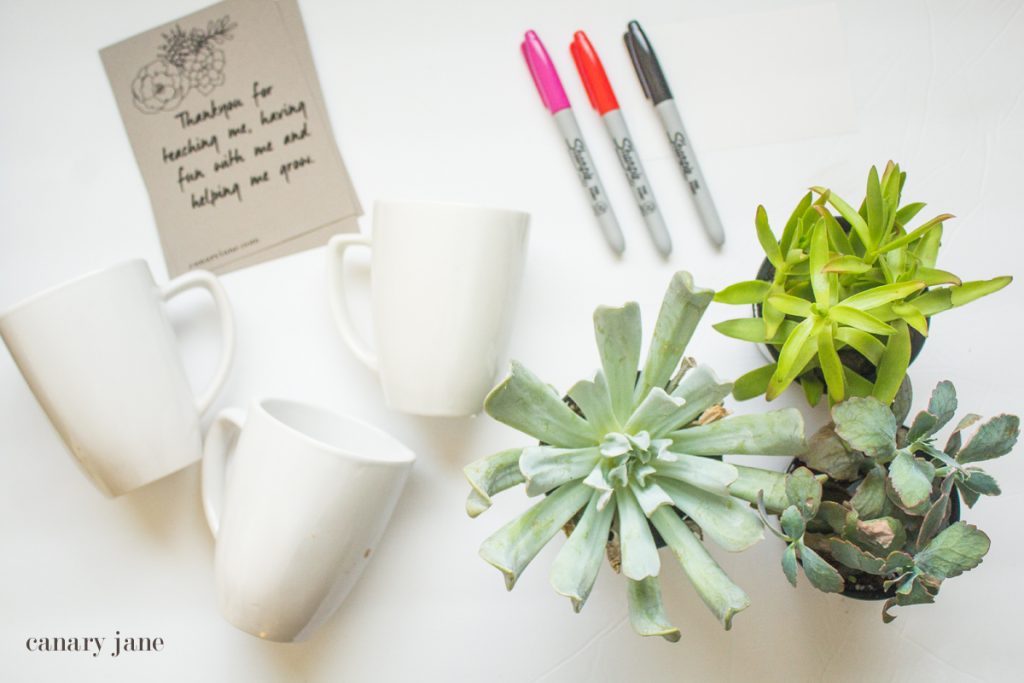
Supplies for the Face Vase:
- plain white ceramic mug or vase that has a simple shape from the dollar store
- black sharpie
- (optional) pink or red sharpie
- (optional) DIY gift card printable – found at the bottom of the post
Fillings can be cut flowers, small flowers or succulents. TIP: Did you know Walmart has a clearance section in Walmart? I’ve found some potted flowers for 75 cents there!

How to make a Face Vase:
- Make sure your mug is clean and remove the sticker at the bottom.
- Have your child sign the bottom of the mug. Add the year.
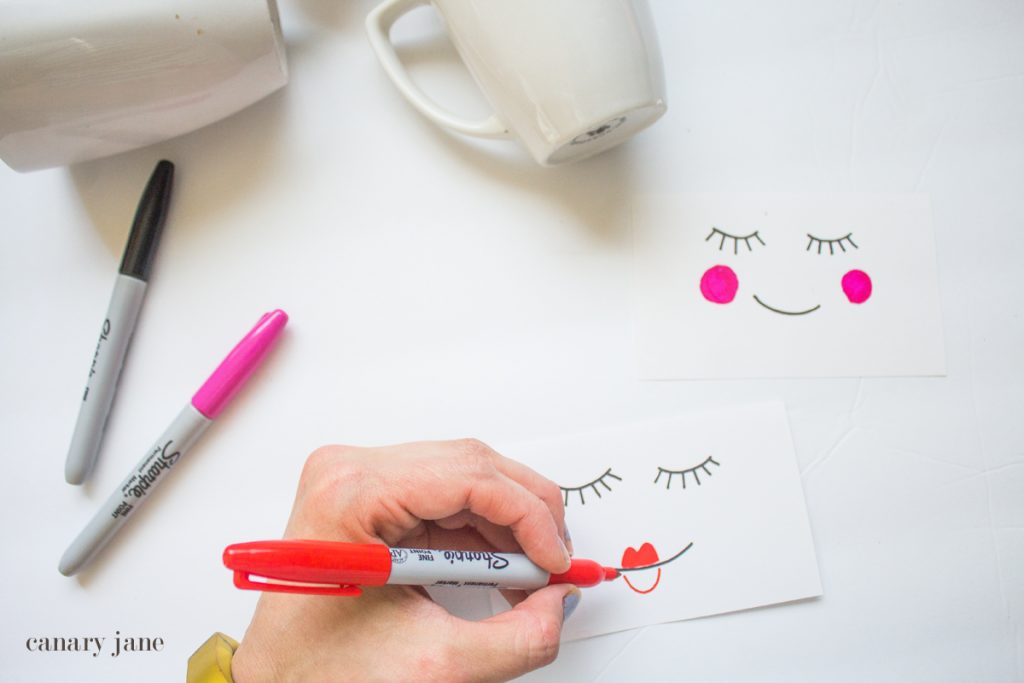
- It’s time to draw on the face. If it helps to take an index card and practice the face feel free to do so.
- Let your mug dry for 30 minutes If you want to cure it so the teacher can drink with it and wash it no problem, cook in the oven at 350 degrees for 30 minutes. Place the mug in the oven before and after warming to prevent cracks.
- Place your plants in the mug and you’re DONE! This craft took me 5 minutes to do not including the drying time. So simple and easy!
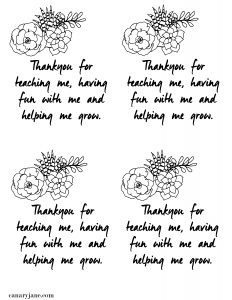
Gift DIY Card
Ok, so you made the face vase. Now you need a card. Bonus! I’ve made one for you! Print this for free. And if you need help scroll down. Also if you don’t want to make the face vase but want to gift the cards, a simple vase and flower with the card is a great alternative.


The plant as hair is just the cutest thing ever
Thanks! I can’t take all the credit haha.