

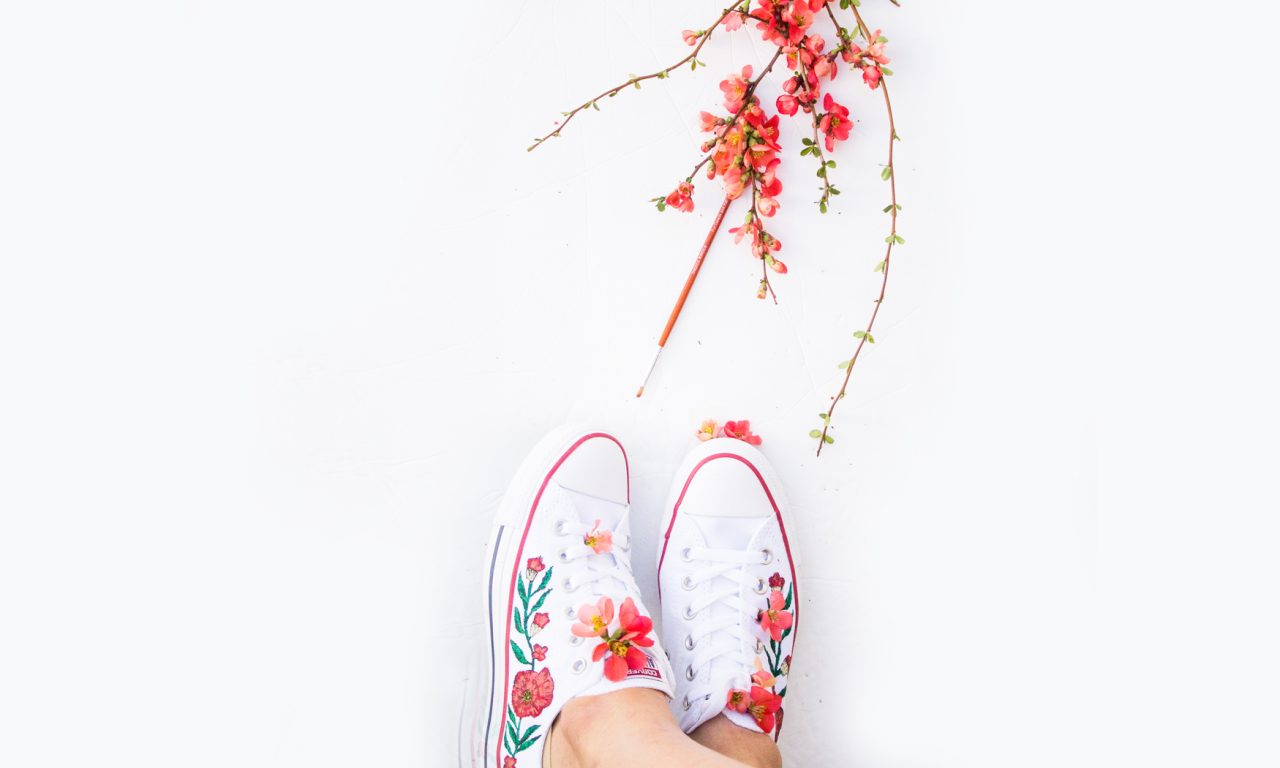
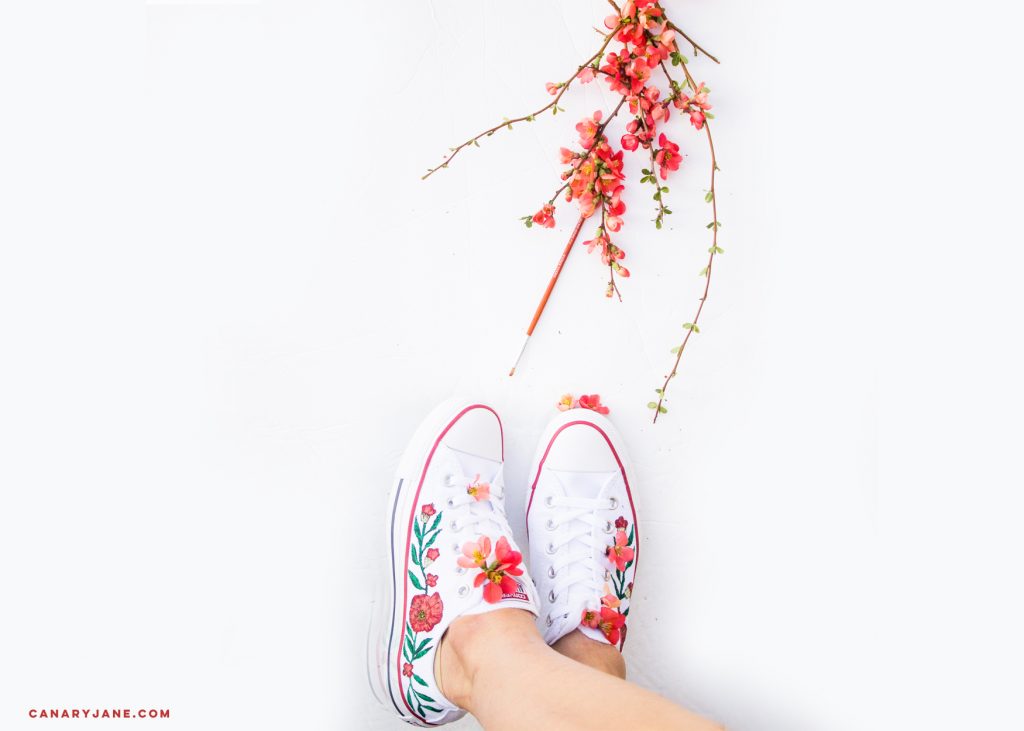
Check out how I made these DIY floral embroidered shoes that look just like these designer Gucci shoes here. These are faux-embroidered shoes so you won’t need any special sewing machines. All you’ll need are a few supplies and a little time to paint. Check out the tutorial below as well my reasons for picking this design.
When Famous Footwear emailed me asking to create a piece using one of their shoes for their #stepforward series I was thrilled. For the first five years of motherhood, I had quit my job and was a stay at home mother. I loved this time in my life. My love for motherhood grew into my heart and soul. But what I didn’t realize is that during this time I was creatively starving. I redecorated my house probably over 100 times and did elaborate birthday parties before the dawn of Pinterest.
When I started blogging and drawing it felt as if I had found a piece of me, as if I bloomed. I remember going to my first creative conference and talking to people, who like me, had spent their whole life creating. They craved it, just like me. These were my people. This is who I was and had always been. Now each day my business and career continues to grow and blossom as I keep stepping forward.
This design stuck out to me because even though my creative career has blossomed I find with each passing day my talents are still developing. New opportunities are always coming at me, stretching me and allowing me to grow. The large flower symbolized the talents I have already shown, ironically like painting, while the other flowers are the new opportunities coming my way. We all have a beautiful journey, and I loved creating these shoes representing mine.
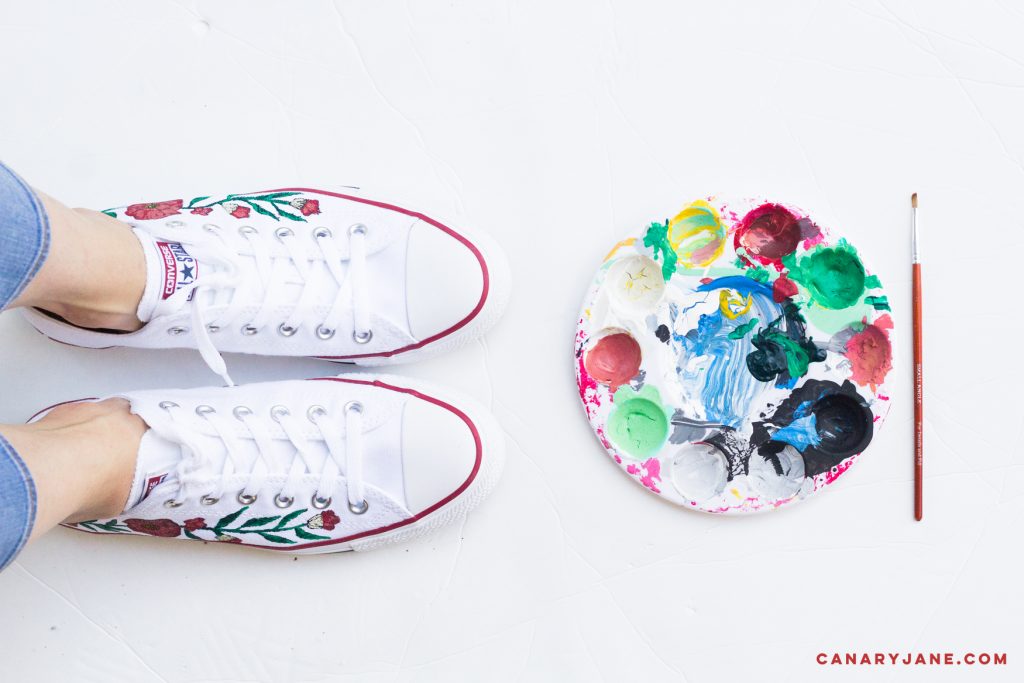
Ok so you’d like to see how I made these DIY floral embroidered shoes. I am happy to share how I made them. First, you’ll need a few supplies:
What you need
#2 round paintbrush
#1 flat paintbrush
black acrylic paint
red acrylic paint
white acrylic paint
yellow acrylic paint
green acrylic paint
a paint pallet or something to hold your paint
Clear Varnish- matte, satin or gloss. I recommend the spray on from Rust-oleum or Kyron.
Water/ Paper towels or washcloth to clean brush
newspaper (optional for under your shoes to protect the furniture)
Ok. So you have your supplies it’s time to make these shoes fabulous! Here are the step-by-step instructions.
TIP: Acrylic paint dries within 10 or so minutes. So remember as you start.
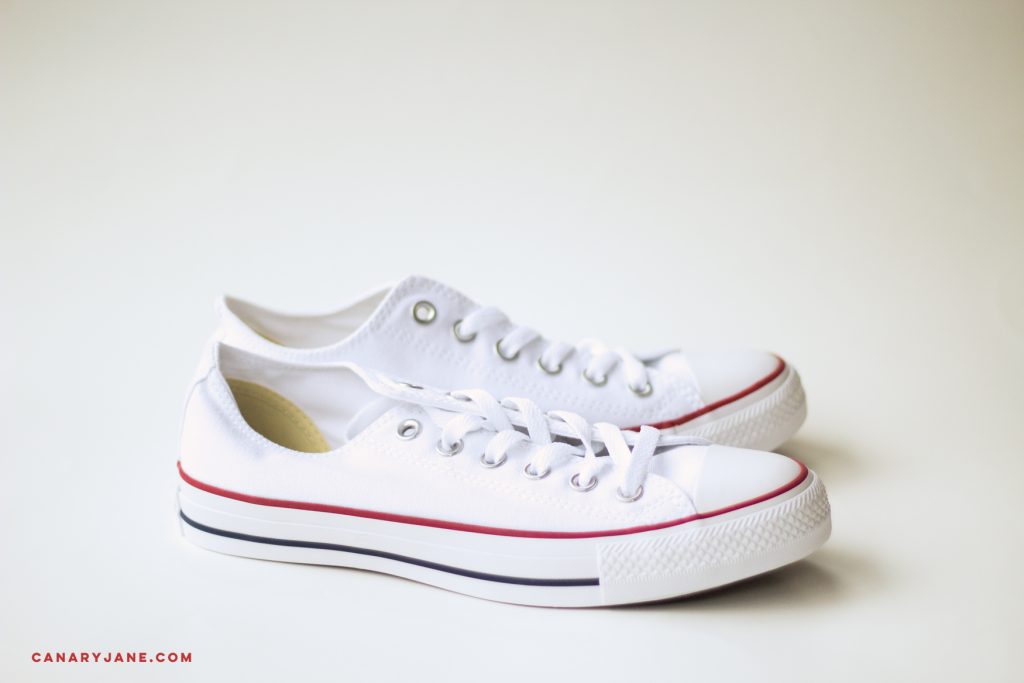
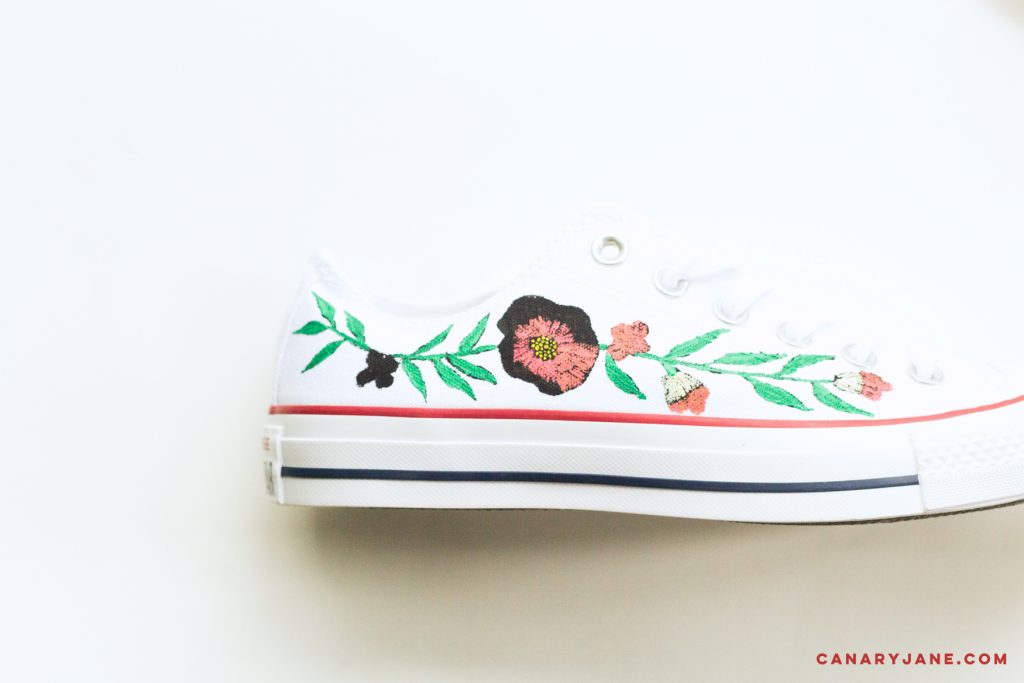
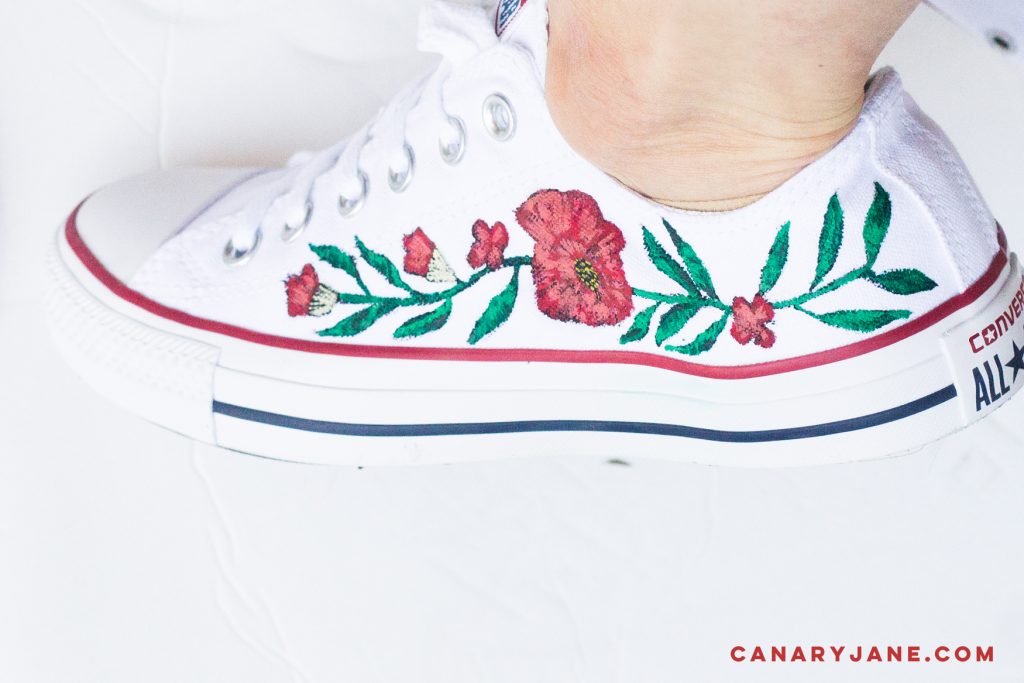
- Take your show and with a pencil lightly outline your design. If you want to do the floral pattern like mine you can check it out on the photo above or you can check out the Gucci embroidered shoe here. I did my design on only one side of the shoe but you could do yours all the way around. Also pay attention to the shape of your shoe so you have enough room for your design.
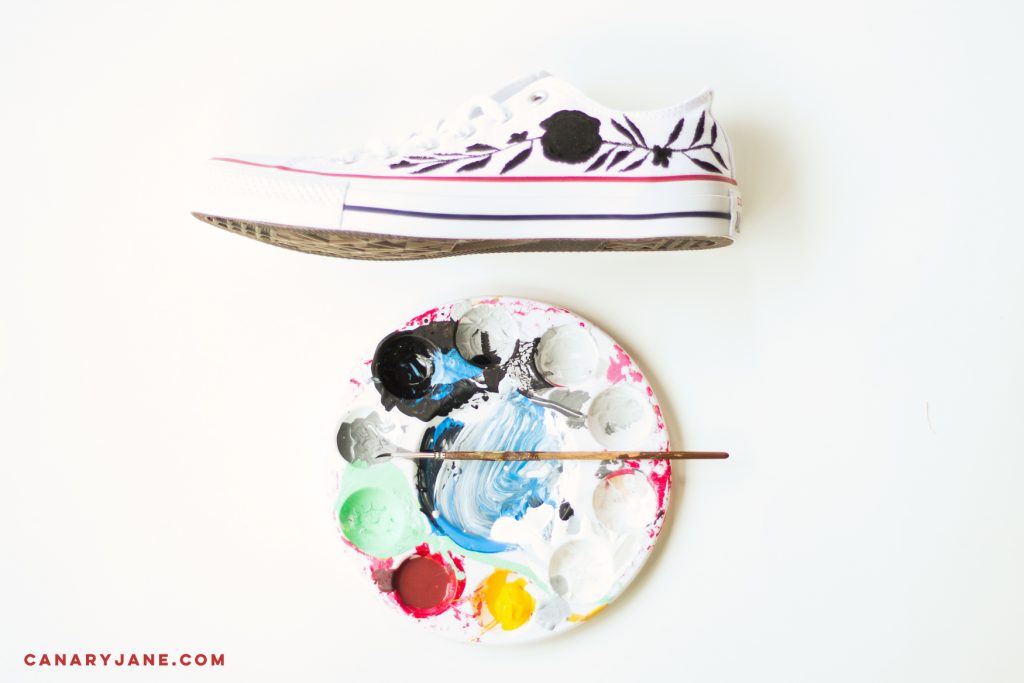
- Once you have outlined your design you will want to take your black acrylic paint and squeeze out about a quarter sized blob of paint. You will take your #2 paintbrush and start filling in the design with the black paint.

- Now starts the fun part, the details. Start with the lightest color, yellow. You’ll take the yellow paint and white and mix about a dime sized amount of each together to create a pale yellow. Use your #1 paintbrush to create the middle of the large flower. You will use this paint brush for all the rest of the details.
- Move to the white and use the white to create lines for the bottoms of the rest of the flowers.
- To do the flower you will want to create three shades of pink. To do this you will mix different mixes of white and red. So to create a pale pink mix more white than red. To make the regular pink mix two dime-sized equal parts red and white. And then to make the darker pink mix more of the red than white.
- Once you have created your three shades of pink start with the lightest pink and start creating lines around the yellow dotted centers. The lines help to look more like the embroidered effect.
- Next go over your lines on the edges of the flower and towards the center with the next darker color. This does not have to be perfect. And I think for it to look more real inconsistency looks better. This is creating the illusion of the threads.
- Last take the darkest color and add a few lines here and there, once again to get a real life effect.
- For the leaves you will want to take your green color and pour out a quarter-sized dollop. Then mix another dollop of green and a little bit of white to lighten the green just a couple shades.
- For the leaves take that handy #1 paintbrush and cover the remaining area with the darkest green.
- The finish it off take the lightest green and add lines mimicking embroidering along the leaves. Remember inconsistency is key.
- Once the paint has dried you will want to spray the painted area with the sealant in a ventilated area. Let dry.
Alright. You are ready to lace up these babies. Thanks for reading this DIY floral embroidered shoes tutorial. If you would like to see more you can click her for more awesome DIY ideas. Comment below with questions. And stay awesome!
![]()
These are super cute!